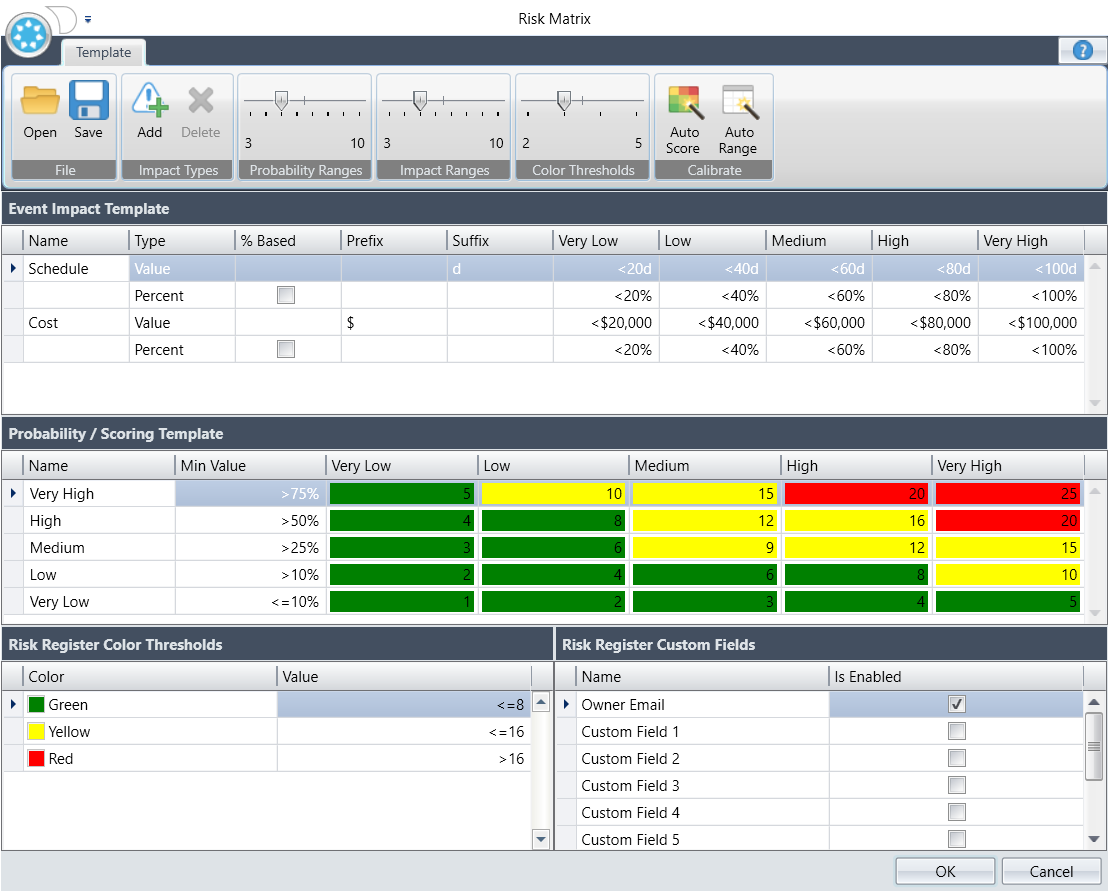
Risk Matrix Dialog Box
Use this dialog box to define how you want risks to be scored when running a risk analysis.
After defining the probability and impact values, the template can be saved and re-applied to other projects and snapshots.
You can use this dialog box to add custom impact types. These are added as columns in the Current and Mitigated sections of the Risk Register. They are not included in the risk analysis calculations; however, adding them here allows you to keep all risk impacts in a single location and to report on them.
When you export the risk register to Excel, the custom risk impacts are included in the export. Similarly, when you import a risk register from Excel, any custom risk impacts that are in the spreadsheet are included in the import.
| Field | Description |
|---|---|
| Open | Click to open a saved template that you can edit and/or apply to a project or snapshot. |
| Save | Click to save the current template. |
| Add | Click to add an impact type. |
| Delete | Click to delete the selected impact type. |
| Probability Ranges | Use the slider to select the number of probability factors in the Risk Matrix. You can select a number between 3 and 10. |
| Impact Ranges | Use the slider to set the number of cost and schedule impact ranges in the Risk Matrix. You can select a number between 3 and 10. |
| Color Thresholds | Use the slider to set the number of colors in the Risk Matrix. You can select a number between 2 and 5. |
| Auto Score | Click to reset the Risk Matrix to the default scoring. |
| Auto Range | Click to reset the cost and schedule ranges to the default settings. |
| Cancel | Click to close the dialog box without updating any mappings. |
| OK | Click to close the dialog box and apply matrix values to the risk mappings. |
In addition, the dialog box features different panes that provide more details on the risk events featured.
| Field | Description |
|---|---|
| Event Impact Template | Use this pane to define cost and schedule impact ranges for risks. Use the Impact Ranges slider to increase or decrease the number of ranges. |
| Probability / Scoring Template | Use this pane to score and color code risk events. |
| Risk Register Color Thresholds | Use the Color Thresholds slider to increase or decrease the number of color thresholds. In addition, use the color palette to select each threshold color. |
| Risk Register Custom Fields | Use this pane to add up to 10 user-defined fields to the risk register. |

- Related Topics:
- Event Template Editor Dialog Box Menu Options
Use these menu options when configuring the risk matrix. - Risk Matrix Event Impact Template Pane
Use the Event Impact Template pane to define risks. - Risk Matrix Probability / Scoring Template Pane
The risk register uses the information in this grid to score and color code the risk events. - Risk Matrix Risk Register Color Thresholds Pane
You can use the color thresholds slider to increase or decrease the number of color thresholds between 2 and 5. In addition you can use the color palette to select each threshold color. - Risk Matrix Risk Register Custom Fields Pane
Use this grid to add up to 10 user-defined fields to the risk register.